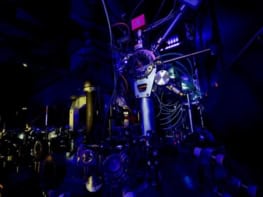
The National Physical Laboratory and Queensgate share an unrelenting passion for better precision at the cutting edge of measurement science

Queensgate – a brand of Prior Scientific Instruments – offers their customers maximum precision and accuracy along with high-speed solutions for the nanopositioning challenges they face. Customer applications range from hard disk testing for companies such as Seagate (see ‘Queensgate reaches the pinnacle of nanopositioning performance‘) to realizing units with national measurement institutes such as the National Physical Laboratory (NPL).
It is this reputation that has seen Queensgate provide high-precision nanopositioning stages for some of NPL’s atomic force microscopes (AFMs), including NPL’s extremely accurate metrological AFM.
The metrological AFM forms a key part of some of NPL’s most important work. As the National Metrology Institute for the UK, it is NPL’s responsibility to ‘realize’ the international standards of measurement – the SI units – in the country. NPL uses this AFM to calibrate transfer standards that are then passed on to other AFM users in order for them to calibrate their AFMs.
Queensgate has been working with NPL in this way for many years. But more recently, NPL came to Queensgate with a more challenging task.
Realizing the metre
The redefinition of the SI in 2019 now means all SI units are based on precise, unchanging and universal fundamental constants of nature. New definitions of the kelvin, ampere, mole and the headline-grabbing kilogram are now in effect. Perhaps less well-known are the changes made to realizing the metre.
The metre was already defined by the speed of light back in 1983. Since then, metrologists have used optical interferometers to realize the metre and make length measurements – and for most measurements this technique is extremely precise. At the nanoscale, however, metrologists must subdivide the wavelength of light, which is several hundred nanometres, making the technique prone to errors.
We needed a bottom up approach, at an atomic scale.
Andrew Yacoot
“We needed a bottom up approach, at an atomic scale,” explains Andrew Yacoot, principal research scientist at NPL and chair of the Working Group for Dimensional Nanometrology of the Consultative Committee for Length (one of ten Consultative Committees that oversee the SI units).
To solve this issue, Yacoot and colleagues from other metrology labs used a method directed towards measurement of the Avogadro constant in which the lattice spacing of silicon is measured very accurately using a technique called X-ray interferometry. “We were able to use this technique together with the known value of silicon lattice spacing to characterize and measure errors in optical interferometers or other displacement sensors, as a technique for making traceable length measurements at the nanoscale” he says.
Queensgate was tasked with designing a custom nanopositioning stage and digital controller for Yacoot’s X-ray interferometry work. “The specification was challenging, because I wanted a long range of measurement (several hundred micrometres) together with picometre resolution and the stage’s payload was almost 1 kg,” he explains. “These are competing requirements for stage design.”
To reduce the overall system noise, the Queensgate team used a digital interface to apply commands. This also allowed greater timing accuracy, as the field-programmable gate array (FPGA) could conduct all the data processing, including commanding the controller. “We provided an out of the box system that NPL can command and resolve down to 10–20 picometres, ten times smaller than the spacing between the atomic planes in a silicon crystal,” says Queensgate’s Principal Electronics Engineer. “That, I think, is impressive.”
A bi-directional partnership
Dialogue was the key element of the partnership for Yacoot and his team: “We’re very keen to have a deep understanding of how every component works and access to all the signals and control of the equipment, rather than having a black box,” he says. “We want to [use equipment] produced by a company that’s open to a dialogue with us and willing to share information – that’s certainly been the case with Queensgate.”
We want to [use equipment] produced by a company that’s open to a dialogue with us and willing to share information.
Andrew Yacoot
In fact, two-way dialogue and collaboration is the bedrock for the relationship between the two organizations. All Queensgate products are tested using interferometers and electronics, most of which are supplied by NPL. NPL acts as a third-party collaborator in verifying measurements on new products, validating their performance which in turn has helped Queensgate secure substantial new business.
Collaboration, then, benefits both parties. NPL gets to use Queensgate’s high-precision piezo systems and gains access to industry-level expertise in designing high-precision, flexure stages for their applications. Meanwhile, Queensgate gains trusted verification of the accuracy of its products. Moreover, by working in partnership with NPL’s leading experts on applications that push the limits of performance, Queensgate is able to maintain its position as an expert in producing the highest precision stages. Perhaps best of all, the collaboration benefits us all, as knowledge gained from public–private collaborations like this one leads to more accurate measurements, which in turn lead to more efficient and effective technologies and products.


